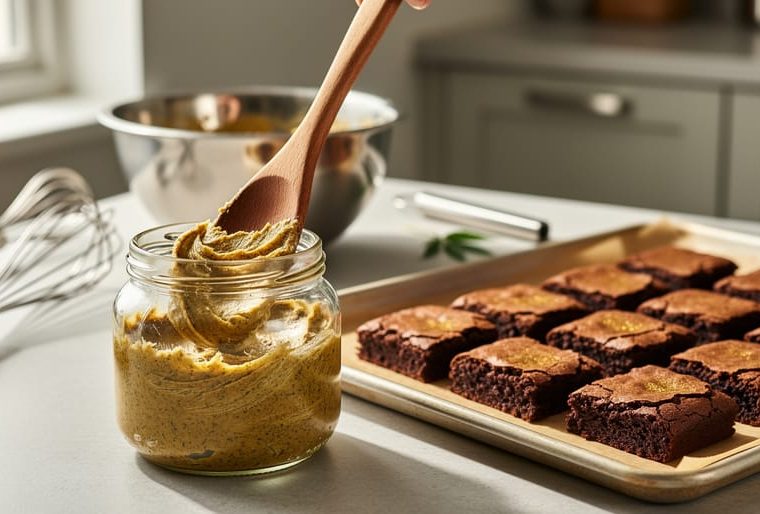
Making cannabis edibles at home involves infusing butter or oil with decarboxylated cannabis, then incorporating that infusion into baked goods, candies, or savory dishes. The process typically takes 3-4 hours from start to finish for a basic batch of cannabutter, and beginners can expect good results with careful attention to temperature control and dosing calculations.
The rise of home cannabis cooking reflects a broader shift in how people consume cannabis. Beyond avoiding the respiratory concerns of smoking, edibles offer longer-lasting effects and the satisfaction of creating customized treats tailored to personal taste and potency preferences. Many home cooks appreciate the control they gain over ingredients, dosing accuracy, and flavor profiles, something rarely achieved with commercial products.
This comprehensive guide walks you through the complete process of creating cannabis edibles, starting with the essential tools and safety considerations you need before beginning. You’ll learn the science behind decarboxylation (the heat-activation step that transforms raw cannabis into its psychoactive form), master the techniques for infusing fats and oils, and discover recipes ranging from classic brownies to sophisticated dinner options.
The key to successful cannabis cooking lies in understanding three fundamentals: proper decarboxylation ensures maximum potency, accurate dosing prevents uncomfortable experiences, and quality ingredients produce better-tasting results. Whether you’re preparing edibles for personal wellness routines, social gatherings, or simply exploring culinary creativity, the step-by-step instructions ahead will help you create consistent, enjoyable products.
Safety remains paramount throughout this process. Cannabis edibles take 45 minutes to 2 hours to produce effects, compared to the near-instant feedback of smoking, making patience essential. The delayed onset has led to numerous cases of overconsumption, particularly among inexperienced users who mistakenly take additional doses before the first takes effect. This guide emphasizes responsible dosing practices and proper labeling to protect both you and anyone who might encounter your creations.
Why Make Your Own Cannabis Edibles
Making your own cannabis edibles at home offers several compelling advantages that appeal to both newcomers and experienced users. The most significant benefit is precise control over dosing, which remains one of the biggest challenges with commercial products. When you prepare edibles yourself, you know exactly how much cannabis goes into each batch and can calculate the approximate milligrams of THC or CBD per serving. This matters because everyone’s tolerance differs, and what works perfectly for one person might be overwhelming or ineffective for another.
Ingredient customization represents another major draw. Commercial edibles often contain artificial flavors, corn syrup, or allergens that don’t align with everyone’s dietary requirements. Making your own means you can create vegan options using coconut oil instead of butter, avoid gluten if needed, reduce sugar content, or incorporate organic ingredients. You’re not limited to the standard gummy bears and chocolate bars available at dispensaries. Want cannabis-infused salad dressing or your grandmother’s cookie recipe with a twist? It’s entirely possible when you control the process.
Cost savings become evident once you factor in the price of commercial edibles versus raw cannabis flower. A batch of homemade brownies using a few grams of cannabis can yield dozens of servings at a fraction of what you’d pay per dose at a dispensary. Over time, particularly for regular users, this difference adds up substantially.
Beyond the practical benefits, there’s genuine educational value in understanding how cannabis transforms from plant material into an active ingredient through decarboxylation, and how cannabinoids bind with fats during infusion. This knowledge helps you troubleshoot problems, adjust recipes confidently, and appreciate the science behind what you’re consuming. The hands-on experience of making edibles teaches you to respect proper techniques, which ultimately leads to safer, more predictable results.
Essential Tools and Ingredients You’ll Need
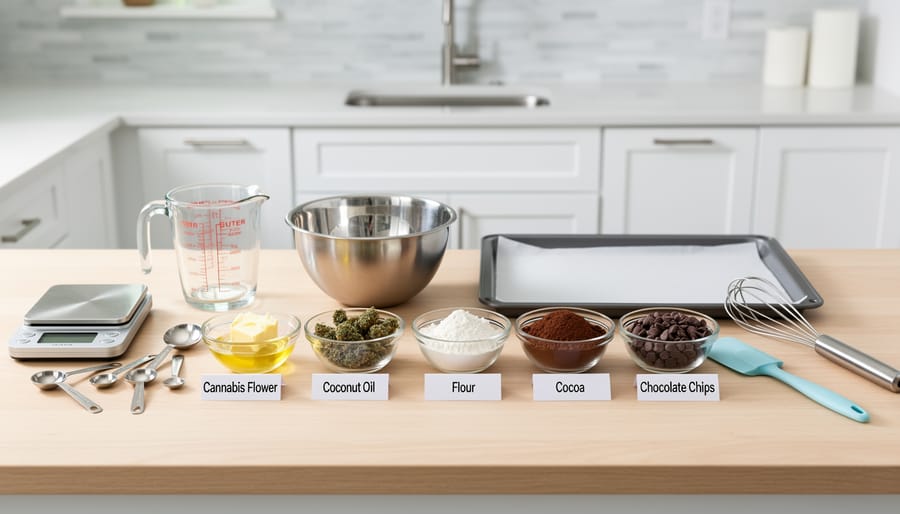
Making cannabis edibles at home doesn’t require specialized equipment, most items are standard kitchen tools you likely already own. However, having the right setup ensures consistent results, accurate dosing, and a safer preparation process. Understanding what each tool does helps you make informed choices about what’s essential versus optional.
Kitchen Equipment You’ll Need
A few key tools make the difference between guessing and knowing your edibles are properly prepared:
- Herb grinder, Breaks cannabis flower into uniform pieces for even decarboxylation and better infusion into fats
- Baking sheet with sides, Holds ground cannabis during decarboxylation; sides prevent spillage
- Parchment paper, Creates a non-stick surface and prevents cannabis from directly touching metal, which can cause hot spots
- Oven thermometer, Verifies your oven’s actual temperature, critical since most ovens run 10-25°F off their displayed setting
- Slow cooker or double boiler, Maintains steady, low heat for infusing cannabis into butter or oil without burning
- Cheesecloth or fine mesh strainer, Filters plant material from your finished infusion
- Kitchen thermometer, Monitors oil or butter temperature during infusion to stay within the ideal 160-200°F range
- Glass jars with tight-fitting lids, Store your infused butter, oil, or finished edibles while protecting potency
- Measuring cups and spoons, Ensure accurate ratios for consistent potency across batches
The oven thermometer deserves special emphasis. Temperature accuracy directly affects decarboxylation success, and an oven running too hot can destroy cannabinoids while one running cool won’t activate them properly.
Base Ingredients
Your cannabis edibles start with three categories of ingredients. First, you need cannabis flower (the most common choice) or concentrate. Flower typically contains 10-25% THC depending on strain, while concentrates can reach 70-90%.
Second, you’ll need a carrier fat. Cannabinoids bind to fat molecules, not water, making butter and coconut oil the most popular options. Butter works in nearly any recipe and offers rich flavor. Coconut oil suits vegan diets and provides a neutral base for both sweet and savory applications. Both store well and distribute cannabinoids evenly.
Third, keep standard pantry staples on hand: flour, sugar, eggs, baking powder, and flavorings specific to your chosen recipe. These don’t differ from regular cooking, you’re simply incorporating your prepared cannabis butter or oil as you would any other fat.
Critical Safety Guidelines and Dosing Principles
Before you begin cooking, understanding the safety fundamentals of cannabis edibles can mean the difference between an enjoyable experience and an uncomfortable one that lasts hours longer than you’d like.
Start Low and Go Slow
The golden rule for cannabis edibles is starting with a dose of 2.5 to 5 milligrams of THC if you’re new to edibles or have low tolerance. Even if you’re a regular cannabis smoker, edibles produce different effects because THC is metabolized through your liver rather than your lungs, creating a more potent compound called 11-hydroxy-THC. This metabolite crosses the blood-brain barrier more efficiently and produces stronger, longer-lasting effects than inhaled cannabis.
Once you consume an edible, expect to wait 30 minutes to 2 hours before feeling anything. The delay depends on your metabolism, whether you’ve eaten recently, and the type of edible. This waiting period is where most mistakes happen. People assume the edible isn’t working and take more, only to have both doses hit simultaneously. Wait at least 2 hours, preferably 3, before considering an additional small dose.
Understanding Potency and Calculating Doses
Every cannabis edible recipe starts with knowing your source material’s THC percentage. If your cannabis flower tests at 20% THC, one gram contains roughly 200 milligrams of THC. After decarboxylation, you’ll retain about 70-90% of that potency depending on your technique. When you infuse that decarbed cannabis into butter or oil, then divide the infused product into servings, you can estimate milligrams per piece. For instance, if you infuse 3.5 grams of 20% THC flower into 1 cup of butter (retaining 80% potency), you have approximately 560 milligrams of THC total. Dividing that butter into 24 cookies means roughly 23 milligrams per cookie.
Organizations establishing cannabis compliance standards recommend clear dosing protocols, and many professionals pursue online cannabis certification to better understand these calculations. Be aware that homemade edibles rarely distribute THC perfectly evenly throughout the batch, so treat your calculated dose as an estimate.
Storage and Legal Considerations
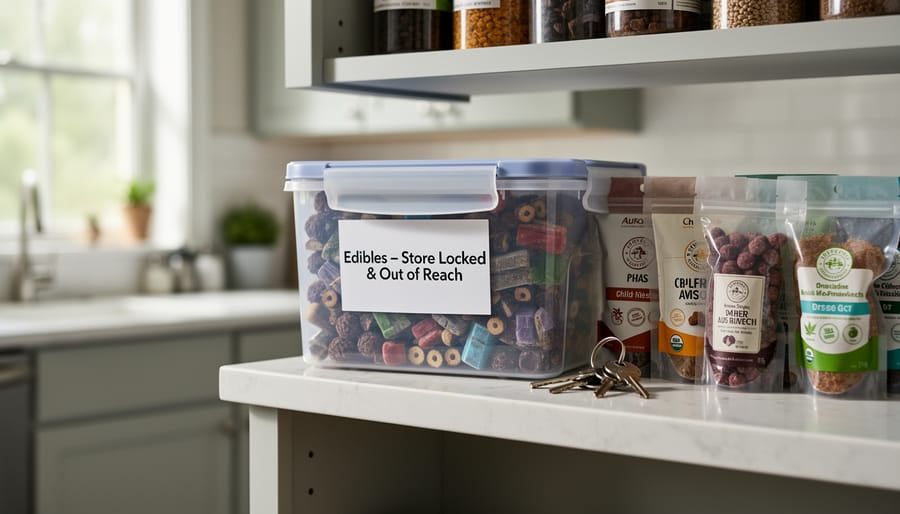
Store all cannabis edibles in clearly labeled, child-resistant containers away from regular food. Accidental consumption by children or pets can require emergency medical attention. Include the date made, estimated THC content per serving, and a clear warning that the product contains cannabis. Keep edibles refrigerated or frozen and separate from anything that looks similar to avoid mix-ups.
Check your local laws before making cannabis edibles. Even in regions where cannabis is legal, restrictions often apply to homemade edibles, possession limits, and sharing with others. Never give edibles to someone without their explicit knowledge and consent.
THC affects cognitive function, including effects on memory and coordination, so plan to stay home for several hours after consuming edibles. Don’t drive, operate machinery, or make important decisions while under the influence.
Step-by-Step: The Decarboxylation Process
Decarboxylation transforms raw cannabis into its psychoactive form by applying controlled heat to convert THCA and CBDA into THC and CBD. Without this activation step, your edibles won’t produce the desired effects, no matter how much cannabis you use.
Raw cannabis contains cannabinoid acids that need heat to shed a carboxyl group and become bioavailable. When you smoke or vape, this conversion happens instantly. For edibles, you must decarboxylate separately before infusing your carrier fat.
The sweet spot for decarboxylation sits between 220°F and 245°F. Lower temperatures preserve more terpenes but require longer heating. Higher temperatures work faster but risk degrading cannabinoids into less desirable compounds. Most home cooks find 240°F for 40 minutes delivers reliable results.
- Preheat your oven to 240°F and line a baking sheet with parchment paper.
- Break cannabis flower into rice-sized pieces using your hands or a grinder, spreading them evenly on the prepared sheet.
- Bake for 30-45 minutes, checking at the 30-minute mark for flower or 20-minute mark for kief and concentrates.
- Look for a light golden-brown color and a toasted, nutty aroma as indicators of complete decarboxylation.
- Remove from the oven and allow the material to cool completely before proceeding to infusion.
Flower requires the full 40-minute treatment due to its density and moisture content. Kief and concentrates decarb faster because they contain less plant material and have greater surface area exposed to heat. Start checking concentrates at 20 minutes to avoid overheating.
Properly decarbed cannabis shifts from bright green to a darker, toasted appearance. The material becomes brittle and crumbles easily between your fingers. If it still looks vibrant green or smells fresh and grassy, it needs more time. Burnt, blackened edges mean you’ve gone too far and destroyed cannabinoids.
An oven thermometer provides accuracy since many home ovens run hotter or cooler than their displays indicate. Covering your baking sheet loosely with foil during the process helps distribute heat evenly and prevents hot spots that can burn portions of your cannabis.
Making Cannabis-Infused Butter (Cannabutter)
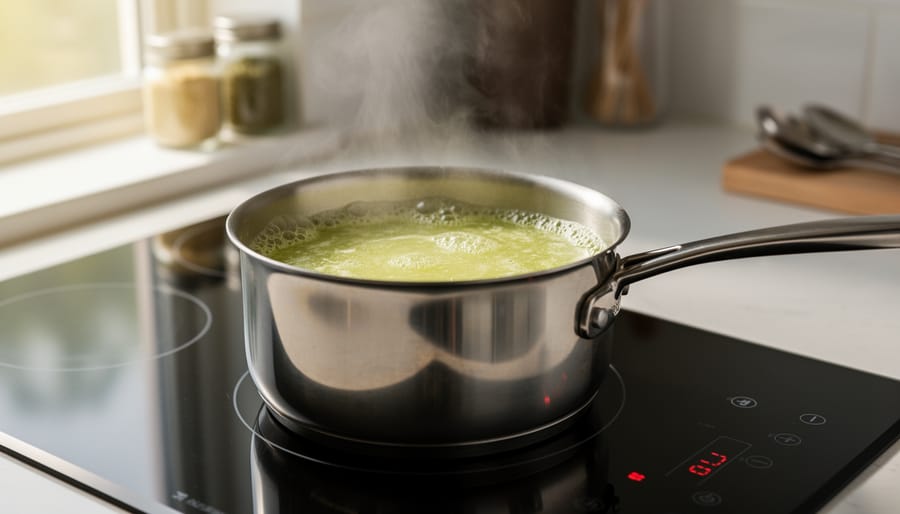
Cannabutter serves as the foundation for countless cannabis edibles recipes because it combines effortlessly with existing baking and cooking routines. Fat molecules bind effectively with cannabinoids, making butter an excellent carrier that preserves potency while adding familiar flavor and texture to finished dishes. You can swap cannabutter directly into any recipe calling for regular butter, from cookies and cakes to pasta sauces and sautéed vegetables.
The basic ratio is one cup of butter to every 7-10 grams of decarboxylated cannabis flower, though you can adjust this based on desired strength. Using more butter with the same amount of cannabis creates a milder product suitable for recipes where you’ll use larger quantities, while a more concentrated ratio works well when recipes call for just a tablespoon or two.
- Combine one cup of butter and one cup of water in a saucepan or slow cooker. The water prevents scorching and will separate out later.
- Heat the mixture on low until the butter melts completely, then add your decarboxylated cannabis.
- Maintain a gentle simmer between 160-180°F for 2-3 hours, stirring occasionally. The mixture should never reach a rolling boil.
- Strain the infused butter through cheesecloth into a glass container, squeezing gently to extract liquid without forcing plant material through.
- Refrigerate for several hours until the butter solidifies on top of the water layer.
- Remove the solid butter disc and discard the water beneath it, which contains impurities and water-soluble compounds.
For slow cooker preparation, set the appliance to low and extend the infusion time to 4-6 hours, checking periodically that the temperature stays within the safe range. This hands-off method reduces the risk of overheating while you attend to other tasks.
Store finished cannabutter in an airtight container in the refrigerator for up to two weeks, or freeze it for several months. Label containers clearly with the date, estimated potency per tablespoon, and a warning that the product contains cannabis. To calculate approximate THC content, multiply the grams of cannabis used by its percentage of THC, then multiply by 0.877 to account for decarboxylation efficiency. Divide this total by the number of tablespoons in your batch to estimate milligrams per tablespoon, then adjust based on how much cannabutter your recipe requires per serving.
Making Cannabis-Infused Coconut Oil
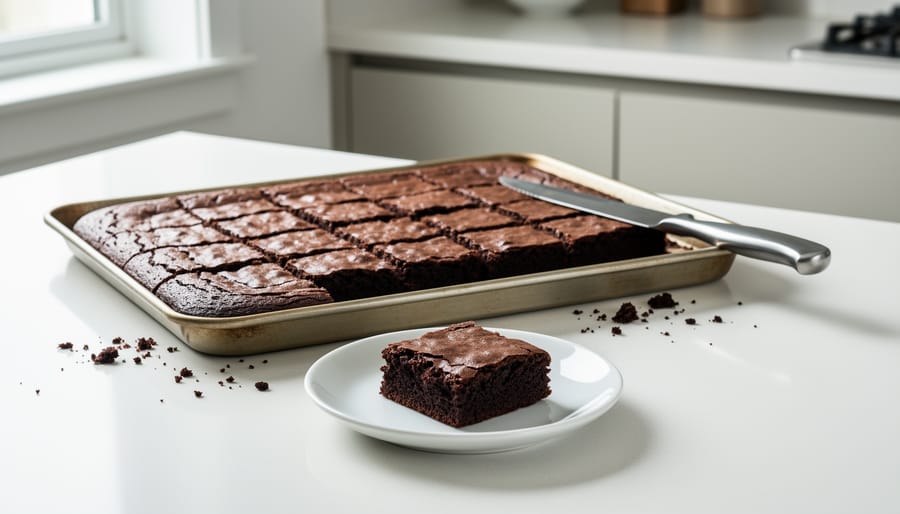
Coconut oil serves as an excellent alternative to butter for cannabis infusions, bringing unique advantages to your edible-making toolkit. Its high fat content efficiently binds with cannabinoids, while its longer shelf life and dairy-free composition make it ideal for vegan recipes and those with lactose sensitivities.
Start with a 1:1 ratio by cup, one cup of coconut oil to one cup of ground, decarboxylated cannabis flower. For stronger potency, reduce the cannabis to half a cup; for milder effects, use less flower. Refined coconut oil offers a neutral taste that won’t overpower your recipes, while unrefined (virgin) coconut oil adds a subtle tropical flavor that complements desserts and smoothies.
Use a slow cooker or double boiler to maintain gentle, consistent heat. Combine your decarbed cannabis with the coconut oil and heat on low (160-180°F) for 2-3 hours, stirring occasionally. The longer infusion time allows thorough cannabinoid extraction without degrading the compounds. Never let the temperature exceed 200°F, as excessive heat destroys THC and CBD.
Once infused, strain the mixture through cheesecloth into a glass jar, squeezing gently to extract all the oil without forcing plant material through. The finished product should have a light green tint.
Cannabis coconut oil solidifies at room temperature and stores well in a sealed container for up to six months in a cool, dark place. Its stability makes it particularly convenient compared to cannabutter, which requires refrigeration and loses potency faster. The oil works seamlessly in baked goods, can be added to coffee or smoothies, and substitutes directly for regular coconut oil in any recipe, making it one of the most versatile infusions for your cannabis cooking repertoire.
Beginner-Friendly Cannabis Edibles Recipes
Classic Cannabis Brownies
Cannabis brownies remain the gateway recipe for home cannabis cooking because they’re forgiving, familiar, and easy to portion accurately. This recipe yields 16 brownies at approximately 10mg THC each (assuming you start with 3.5 grams of 20% THC flower properly infused into your butter).
Ingredients:
– ½ cup cannabutter (made from 3.5g cannabis flower)
– 1 cup sugar
– 2 eggs
– ⅓ cup cocoa powder
– ½ cup all-purpose flour
– ¼ teaspoon salt
– ¼ teaspoon baking powder
– 1 teaspoon vanilla extract
Preheat your oven to 350°F and grease an 8×8 inch baking pan. In a mixing bowl, cream together the cannabutter and sugar until smooth. Beat in the eggs one at a time, then add vanilla. In a separate bowl, combine cocoa powder, flour, salt, and baking powder. Gradually fold the dry ingredients into the wet mixture until just combined, don’t overmix.
Pour the batter into your prepared pan and spread evenly to the edges. This step matters: uneven batter means uneven potency per piece. Bake for 20-25 minutes. The brownies are done when a toothpick inserted in the center comes out with a few moist crumbs, not wet batter. Overbaking dries them out and can degrade some THC.
Let the brownies cool completely in the pan before cutting. Use a ruler to mark 4 equal rows in each direction, creating 16 uniform squares. Clean your knife between cuts for neat edges. Store in an airtight container with clear labeling showing the approximate dose per brownie.
Cannabis Gummies
Start by preparing your silicone gummy molds and having all ingredients measured and ready, as the mixture sets quickly once removed from heat. You’ll need one 3-ounce package of fruit-flavored gelatin (any flavor), three tablespoons unflavored gelatin powder, half a cup of cold fruit juice, one tablespoon light corn syrup, and your measured cannabis tincture or oil. For dosing, calculate your total THC content and divide by the number of gummies your mold produces. A standard 24-cavity mold makes this straightforward: if you’re using a tincture containing 240mg THC total, each gummy will contain 10mg.
Combine both gelatins with the cold juice in a small saucepan and let bloom for two minutes. Add the corn syrup, then heat over low while whisking constantly until the mixture is completely smooth and just begins to steam, but don’t let it boil. Remove from heat and let cool for one minute, then add your cannabis tincture or oil and whisk thoroughly to distribute evenly. If using oil rather than alcohol-based tincture, add a small pinch of sunflower lecithin to help emulsification.
Working quickly, use a dropper or small measuring cup to fill each mold cavity to the top. Refrigerate for at least 30 minutes until firm. Pop the gummies out and store them in an airtight container in the refrigerator for up to two weeks. Each piece should contain a consistent dose since the cannabis was added after cooking and mixed thoroughly throughout the liquid base.
Savory Cannabis Crackers
Cannabis crackers offer a sophisticated alternative to sweet edibles and integrate seamlessly into everyday meals or serve as standalone snacks. Start by preheating your oven to 350°F. Combine 1 cup whole wheat flour, ½ teaspoon sea salt, ½ teaspoon garlic powder, and 1 teaspoon dried rosemary (or herbs of your choice) in a mixing bowl. Cut in 3 tablespoons of room-temperature cannabutter until the mixture resembles coarse crumbs. Gradually add cold water, one tablespoon at a time, until the dough just comes together.
Roll the dough thin on a floured surface, about ⅛ inch thick, and cut into uniform squares or use cookie cutters for consistent sizing, which helps ensure even dosing. Transfer to a parchment-lined baking sheet, prick each cracker with a fork to prevent puffing, and bake for 12-15 minutes until the edges turn golden brown.
This recipe yields approximately 24 crackers. Calculate potency by dividing your total cannabutter THC content by 24. These crackers pair well with cheese, hummus, or soups, allowing you to incorporate cannabis into regular meals rather than treating it as a separate dessert item. Store in an airtight container for up to one week.
Cannabis-Infused Honey
Cannabis-infused honey offers one of the simplest and most versatile ways to incorporate cannabis into your daily routine. Unlike baked goods that require precise timing, cannabis honey requires only two ingredients: quality honey and decarboxylated cannabis or cannabis oil.
The key to successful infusion lies in maintaining a gentle, steady temperature between 95°F and 110°F. Higher temperatures can degrade cannabinoids and damage the beneficial enzymes in raw honey. Use a double boiler or mason jar in a water bath to maintain control. Combine one cup of honey with 3.5 to 7 grams of finely ground, decarbed cannabis, depending on desired potency. Heat for 30 to 40 minutes, stirring occasionally.
After infusing, strain the mixture through cheesecloth while the honey is still warm and fluid. The result is a golden, slightly greenish honey that dissolves easily in hot beverages, spreads on toast, or sweetens yogurt and oatmeal. Because honey is a natural preservative, cannabis-infused honey stores well for several months in an airtight container at room temperature, away from direct light. Start with a teaspoon to gauge potency, and wait at least 90 minutes before consuming more.
How to Calculate and Verify Potency
Calculating the potency of your homemade cannabis edibles requires a straightforward formula, though you’ll need to accept some built-in imprecision. Start by checking the THC percentage listed on your cannabis packaging (if purchased legally) or use an estimated 10-15% for mid-quality flower if you’re unsure. Multiply this percentage by the weight of cannabis you’re using, then multiply by 1,000 to convert to milligrams. A gram of 15% THC flower contains roughly 150mg of THC.
Next, account for decarboxylation efficiency. Even with proper technique, you’ll typically convert only 70-90% of available THC. A conservative estimate of 75% works well for home calculations. Multiply your initial THC amount by 0.75 to get your usable THC content. Some will also be lost during infusion and straining, so consider another 10-20% reduction for a realistic final figure.
Divide your adjusted total THC by the number of servings your recipe yields. For brownies cut into 16 pieces, this determines milligrams per piece. Write this number down and label your batch clearly.
Home calculations provide useful estimates but can’t match lab accuracy. Variables like uneven mixing, hotspots during decarboxylation, and inconsistent plant material all affect final potency. Your edibles might be 20-30% weaker or stronger than calculated. If you’re making edibles regularly or for medical use requiring precise dosing, professional lab testing costs $30-75 per sample and delivers exact cannabinoid profiles. For occasional home baking, the formula above gives you enough information to dose conservatively and adjust future batches based on effects.
Troubleshooting Common Problems
Making cannabis edibles at home involves some trial and error. Even experienced cooks run into issues that can affect potency, taste, or consistency. Understanding these common problems and their fixes will help you troubleshoot batches and improve your technique.
Weak or Inconsistent Potency
The most frustrating problem is edibles that don’t deliver the expected effects. This usually traces back to incomplete decarboxylation, if your cannabis wasn’t heated long enough or at the right temperature, the THC remains inactive. Solution: verify your oven temperature with a separate thermometer and ensure you’re decarbing for the full 30-45 minutes at 220-245°F. Another cause is insufficient infusion time. Cannabis needs at least 2-3 hours in your carrier fat to extract properly. If you rushed the process, the cannabinoids didn’t fully transfer.
Burnt or Bitter Taste
Overheating during infusion creates a harsh, unpleasant flavor that ruins your edibles. Keep your butter or oil below 245°F throughout the infusion, higher temperatures degrade cannabinoids and burn plant material. Use a candy thermometer to monitor temperature continuously. If your batch tastes bitter, you may have skipped straining or left too much plant matter in the final product. Strain your infusion through cheesecloth twice for cleaner flavor.
Uneven Distribution
Some pieces feel potent while others have no effect, which creates dosing inconsistencies and safety concerns. This happens when cannabutter or oil isn’t mixed thoroughly into your batter or dough. Before baking, stir your mixture for at least two full minutes to distribute the infused ingredient evenly. For gummies or candies, stir constantly during the cooling phase to prevent the cannabis from settling.
Why do my edibles have no effect?
The most common cause is skipping or improperly performing decarboxylation, which means the THC wasn’t activated. Ensure you heat cannabis at 220-245°F for 30-45 minutes before infusion.
How can I fix edibles that taste too much like cannabis?
Strain your infusion thoroughly through cheesecloth and consider using less plant material with higher-potency starting flower. Adding vanilla extract or citrus zest to recipes also helps mask the herbal flavor.
What causes texture problems in cannabis brownies or cookies?
Cannabutter or oil that’s too warm when added to batter, or over-mixing after adding cannabis ingredients, can affect texture. Let your infusion cool to room temperature and fold it in gently.
Understanding these issues helps you create safer, more reliable edibles. For comprehensive guidance on responsible preparation and consumption, edibles safety training covers best practices that prevent common mistakes. Keep detailed notes on your process, temperature, timing, ratios, so you can replicate successes and identify what went wrong in failed batches. Since delayed onset means you won’t know if adjustments worked for an hour or more, patience and record-keeping are essential. Recognizing that cannabis consumption can temporarily affect cognition, including how cannabis affects memory reinforces why precise dosing and clear labeling matter for responsible home preparation.
Storage, Labeling, and Responsible Use
Proper storage protects both the quality of your cannabis edibles and the people around you. Most homemade edibles stay fresh for one to two weeks in the refrigerator, though freezing extends their shelf life to several months. Store brownies, cookies, and baked goods in airtight containers to prevent staleness and preserve potency. Cannabis-infused oils and butters should be refrigerated in sealed jars with minimal air exposure. Heat, light, and moisture degrade cannabinoids over time, so keep edibles in cool, dark places away from direct sunlight.
Labeling isn’t optional. Every container of homemade edibles needs clear information to prevent accidental consumption and support responsible handling. At minimum, your labels should include:
- The date you made the edibles
- Estimated THC content per serving in milligrams
- A clear warning that the food contains cannabis
- Storage instructions and expiration guidance
- A reminder to keep away from children and pets
Use opaque containers when possible so the edibles don’t resemble regular food at first glance. Consider using warning stickers or bright labels that immediately signal the contents are medicated.
When sharing edibles, transparency matters. Never give someone a cannabis-infused food without their explicit knowledge and consent. Explain the potency, expected onset time, and duration of effects before they consume anything. If someone accidentally consumes too much, stay with them in a calm environment, provide water and light food, and remind them that the intense effects will pass. Symptoms like anxiety, rapid heartbeat, or disorientation can feel frightening but aren’t medically dangerous for most people. However, if someone experiences severe distress or has underlying health conditions, seek medical help without hesitation.
Making cannabis edibles at home puts you in control of your experience from start to finish. By mastering decarboxylation, choosing the right infusion method, and calculating your doses carefully, you create edibles that match your specific needs and preferences. The process isn’t complicated, but it does require attention to detail and respect for the power of what you’re making.
Start with simple recipes like cannabutter or basic brownies before moving to more complex creations. Keep your initial doses low, wait the full two hours to feel effects, and take notes on what works for you. Label everything clearly, store your edibles safely away from others, and never assume someone else knows what they’re consuming.
Your skills will improve with practice, and you’ll develop an intuitive sense for ratios, timing, and your preferred potency levels. Stay curious about new techniques and emerging research on cannabis cooking. The more you understand about how cannabinoids interact with different ingredients and temperatures, the better your results will be. Responsible, informed preparation leads to consistently enjoyable experiences and gives you confidence in what you’re creating.